Implement PHP and MSSQL with IIS Web Server
Why PHP with IIS?
Most instances of PHP applications utilize Apache or Nginx as a web server. However there are valid reasons to run PHP on
IIS such as:
• Your system engineers have more experience with IIS
• Existing support contract with Microsoft
• You have to run ASP.NET or classic ASP applications
• You need to integrate with other Windows services like Active Directory, Windows file shares, or Microsoft Exchange
• If you already have websites running in IIS, it's a good idea to run your PHP websites there too that way everything
is in one place
We will see that running PHP on IIS is pretty easy!
• If you only here for the PHP on IIS, read the first section on IIS installation, then skip over the SQL Server section and go
straight to "Installation: PHP for IIS" in the Table of Contents to finish the PHP setup.
NOTE: For this tutorial I suggest you download all packages to your desktop initially.
Installation: IIS on Windows 10
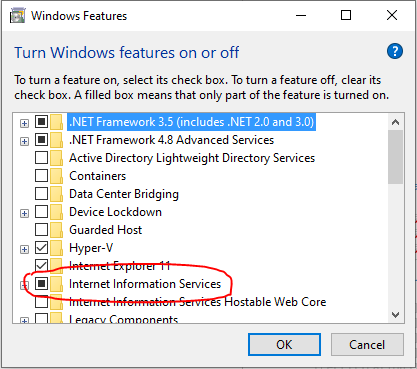
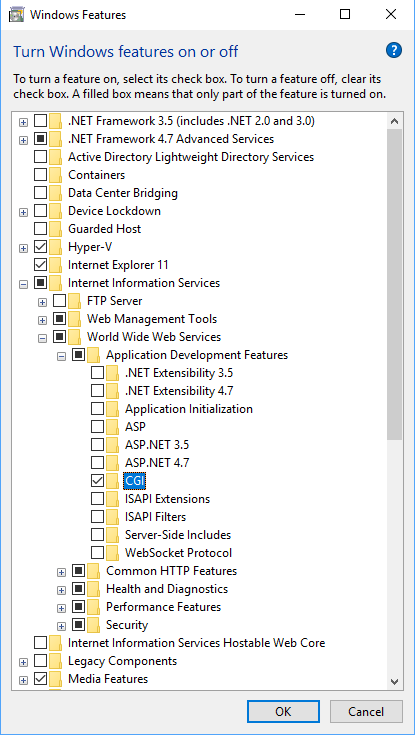
Add IIS and CGI Features in Windows 10
- Add the CGI/IIS Feature
- • Go to Add or Remove Programs -> Optional Features -> More Windows features
- • CGI is Common Gateway Interface, it passes web user requests to application servers, passes it to the PHP engine, and gives back the output from the PHP engine to the client. It is part of the HTTP Protocol. The CGI process starts and stops with every request. FastCGI can keep processes alive over multiple requests and can reuse other resources, making it more useful for bulk operations. It is included by default when you enable CGI for IIS
Installation: IIS on Windows Server 2016
Add IIS and CGI Features in Windows Server 2016
- Open Server Manager
- • Click Manage -> Add Roles and Features wizard
- • Advance wizard to Server Roles page
- • Select Web Server (IIS.) Also add the management features when the window pops up
- • Advance wizard to Role Services page
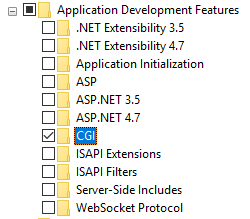
- • Select CGI under Application Development portion of the tree
- • Install
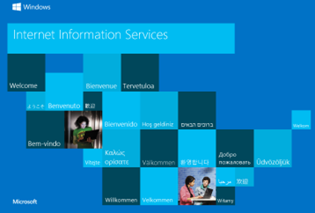
- • Test installation by navigating to http://localhost in web browser (test the Windows 10 installation in the same way)
Installation: MS SQL Server 2019 Express
Click here to navigate to Microsofts download page: SQL Server Downloads
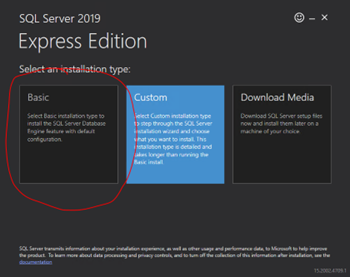
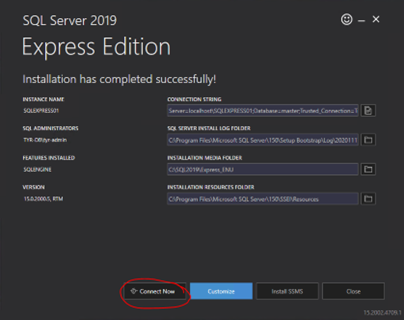
- Install SQL Server Express
- • Run "Basic" install in the default path
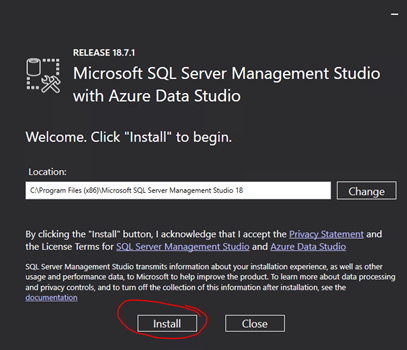
- • Once Installation is complete, select Install SSMS
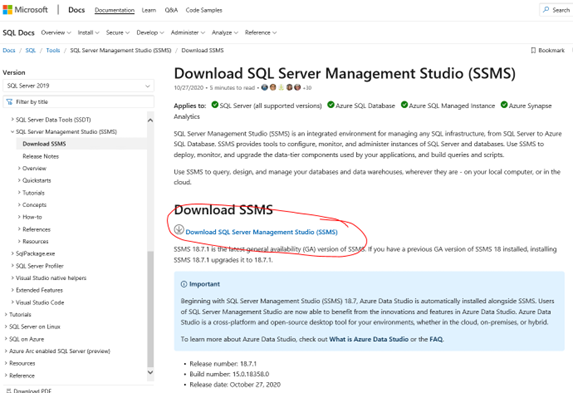
- • Install SQL Server Management Studio (SSMS)
- • You will be sent to the webpage for download on Microsoft Docs download the latest version
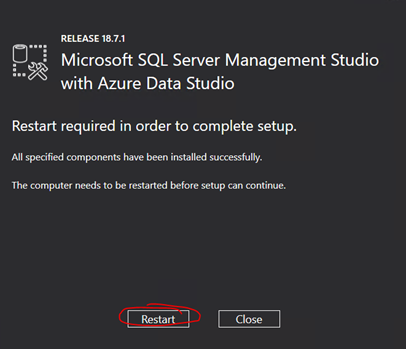
- • Run the SSMS-Setup file
- • Restart the machine
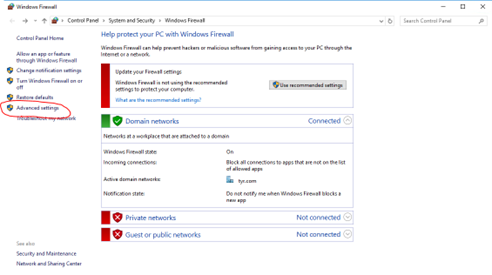
- • Open Windows Firewall in the Control Panel
- • Select "Advanced Settings"
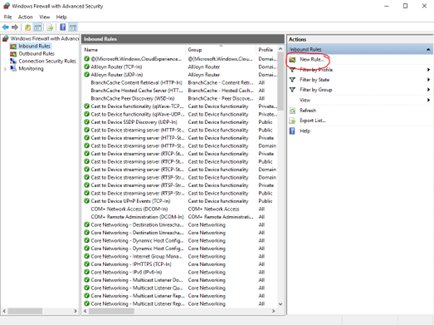
- • Select "Inbound Rules"
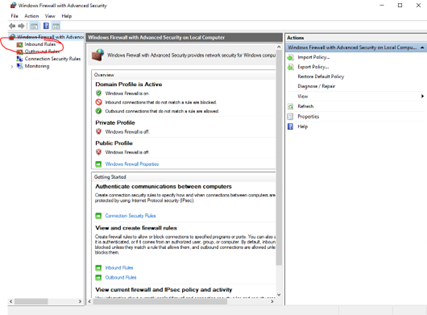
- Add new inbound rule to allow port 1434 for SQL Browser
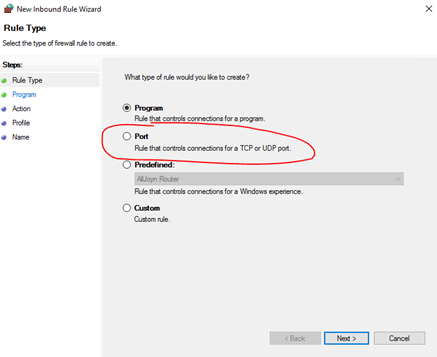
- • Select "New Rule"
- • Select "Port"
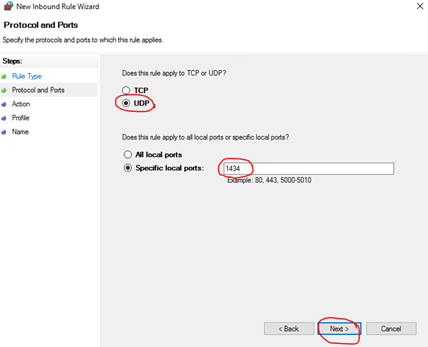
- • Select "UDP" and enter port 1434
- • Advance the wizard the rest of the way through, name the rule(such as SQL Browser), then Finish the wizard
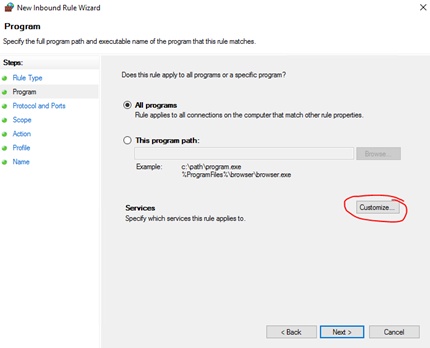
- Create firewall rule for SQL Server service
- • Create a second rule for database and instance. (I create a service-based rule but a program-based rule can be used also)
- • Select "Custom"
- • Select "Customize"
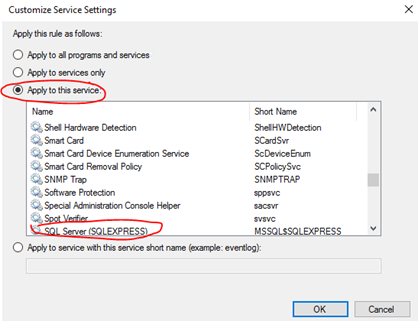
- • Select "Apply to service" and locate the SQL Server Instance
- • Advance through wizard, name the rule (SQL Server Database Engine)
- • Close Firewall


Configuring Replication for distributed databases
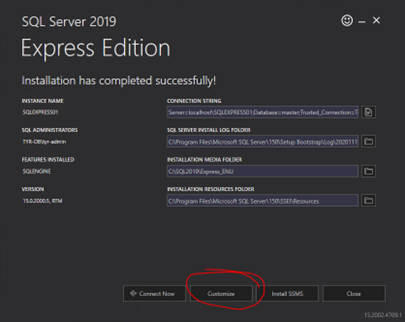
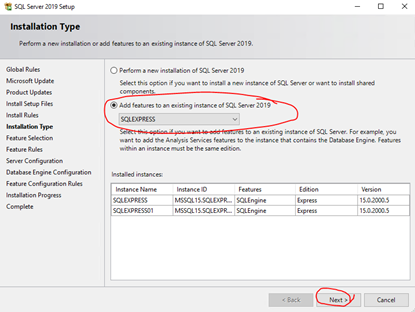
- Customize MS SQL Express Installation (Optional if only one instance is running)
- If the window closed, simply execute the install again
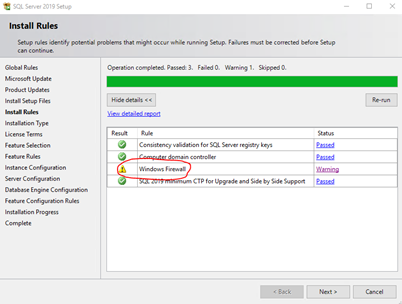
- Select "Customize"
- • If you haven't configured firewall rules you will receive a warning in the wizard
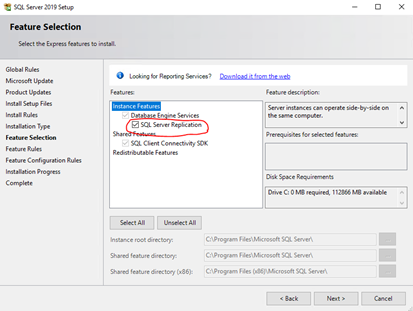
- • Select "Add features to an existing instance of SQL Server 2019"
- • Select "SQL Server Replication"
- • Continue through the installation

Create Database and Table using the Designer
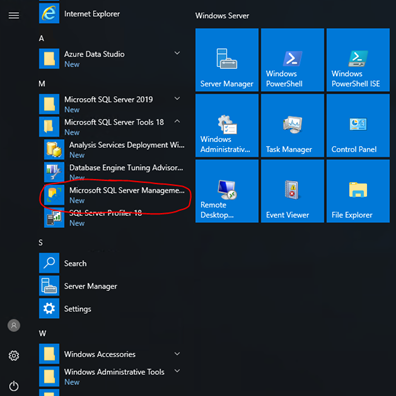
- Create database tables with SSMS
- • Open SQL Server Management Studio (SSMS)
- • Connect to the SQL instance
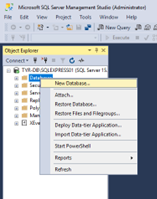
- • Create Database (Right Click Databases -> New Database)
- • Alternatively you can use the query language in the comments, customizing it with the name for your database and the columns you require for your webform
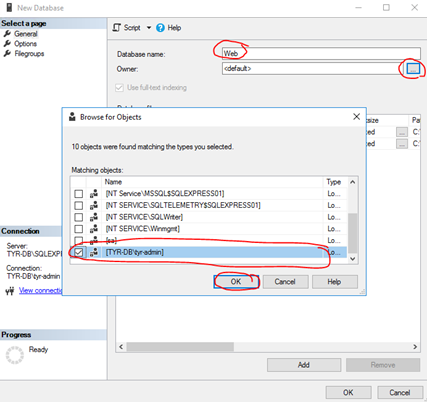
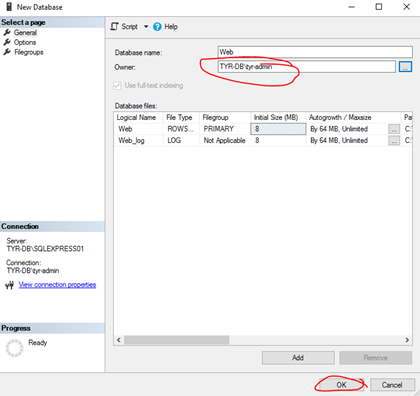
- • Name the database and select the owner by selecting the ellipsis (we will have to configure a customized owner later for IIS to access the DB)
- • Create the database
- • Verify DB Creation and users (notice some are services, and some are users)
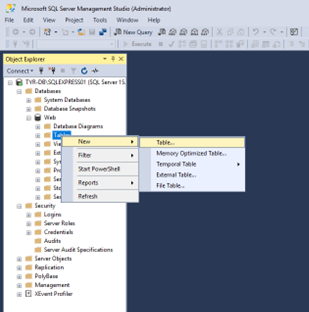
- • Next, we need to create a table inside the database to accept our form input. Right click Tables -> New -> Table (query language can be used instead)
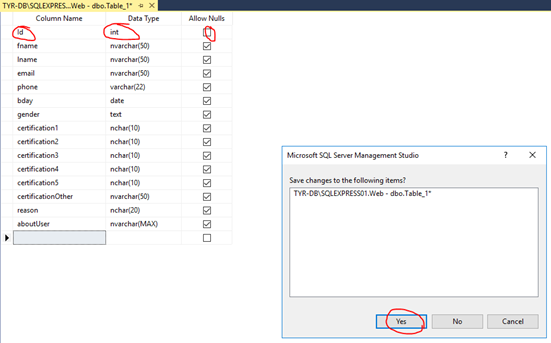
- • Create columns specific to your form requirements (for server-side validation it is a good idea to match your data types with the expected inputs to avoid cross site scripting.) A quick search will yield many tutorials on SQL Data types. The first column should be Id with a data type of int (integer). This is required to increment entries in the DB
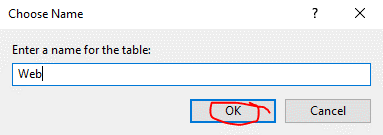
- • Name your table
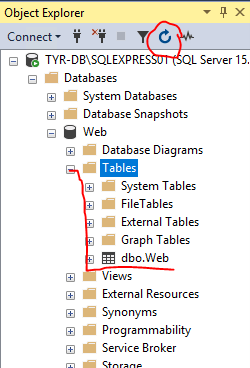
- • Verify table creation (MS SQL will prepend your table name with dbo.[Your Table's Name])
- Change the "Prevent saving changes that require the table re-creation" option
- • "Can't change a column value in a table unless you recreate" error: (This must be done to use Primary Key as Identity if you didn't define it on creation)
- • On the Tools menu, click Options
- • In the navigation pane of the Options window, click Designers
- • Clear the Prevent saving changes that require the table re-creation check box, and then click OK
- Resume table definition
- • Create Primary key and use IDENTITY to auto-increment entries
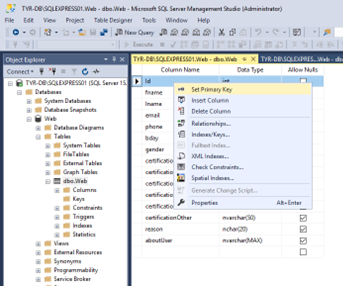
- • Right click table dbo.[Your Table's Name] -> Design
- • Right click Id -> Set Primary Key
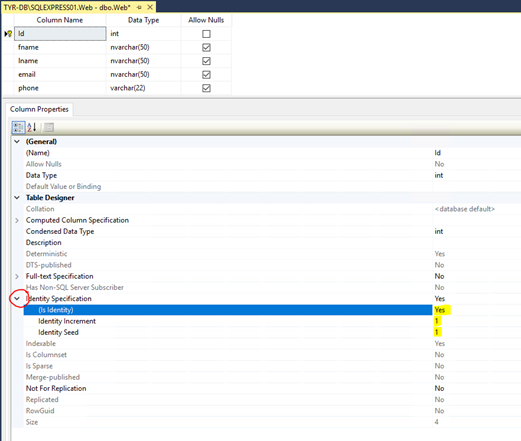
- • In the query, with Id selected, expand the Column Properties below. Expand Identity Specification, change "Is Identity" from No to Yes. Identity Increment and Identity Seed will auto populate
- • For further documentation: Auto-increment PK in SQL Server
- • Close and save query
- • Refresh Object Explorer
- • Expand Keys under dbo.[Your Table's name]
- • Verify Creation of PK (primary key)
- • Keep SSMS open for future steps
Verify SQL Server Express is configured to allow for remote connections
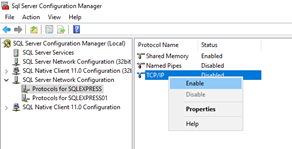
- Enable TCP/IP Connections
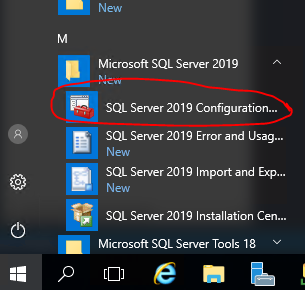
- • Open SQL Server Configuration Manager
- • Expand SQL Server Network Configuration -> Right-click TCP/IP -> Enable
- • Accept the warning
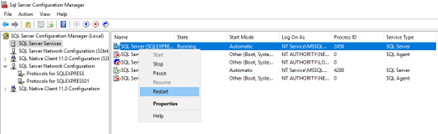
- • Restart the SQL Server Service in the Server Configuration Manager
- • SQL Server Services -> SQL Server (SQLEXPRESS) -> Right-click -> Restart
- • Close SQL Server Configuration Manager
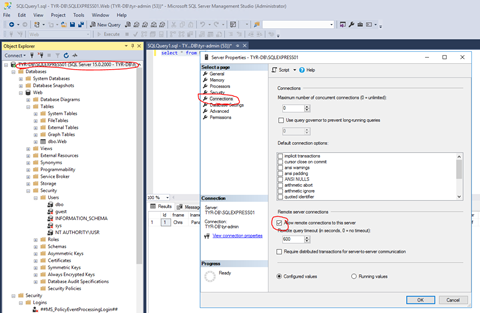
- Ensure DB allows remote connections
- • Right Click DB Instance -> Properties -> Connections -> Allow Remote Connections
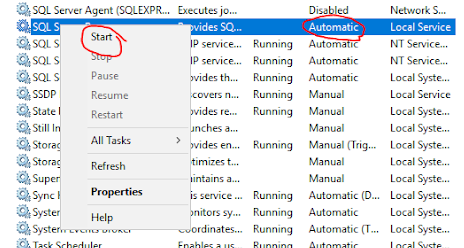
SQL Server Browser
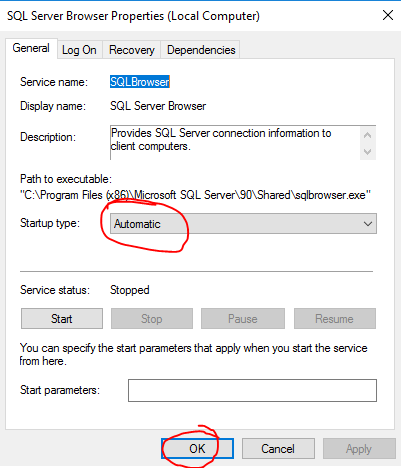
- Configure SQL Server Browser
- • Control Panel ->System and Security ->Administrative Tools -> Services
- • Right-click SQL Server Browser -> Properties -> change Startup Type to Automatic
- • Click "OK"
- • Start Service
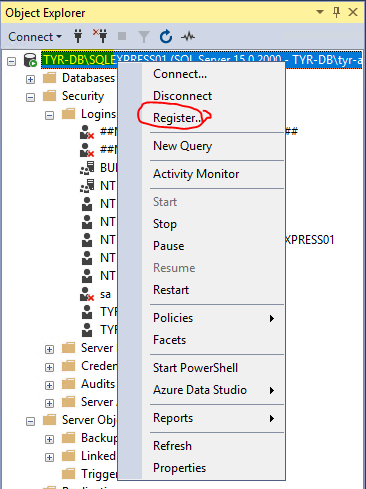
Register Server
- Store the server connection information
- • In SSMS, right click Server instance -> Register
- • Select the local Server name, the preferred type of authentication (Windows Authentication is preferred)
- • Under Registered server type registered server name
- • Test the connection
- • Save
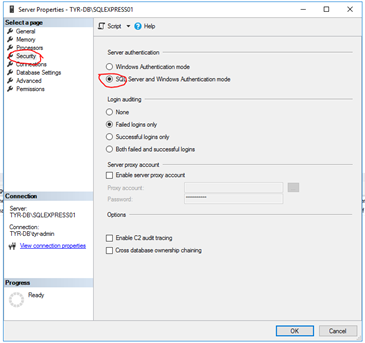
Enable Mixed Authentication
NOTE: Only if Windows Authentication won't suffice
- Inside SSMS
- • Right click server -> Properties
- • Under security -Server Authentication select SQL Server and Windows Authentication mode for mixed authentication
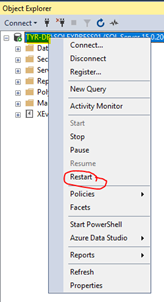
- • Right click Server -> Restart
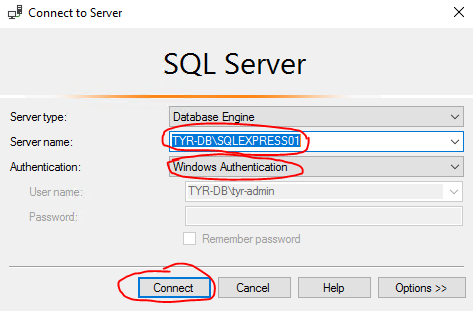
Connecting from another Computer
- Inside SSMS
- • Open SSMS (on the remote machine)
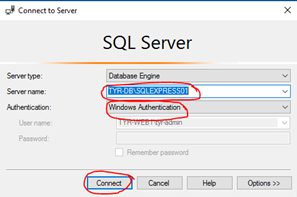
- • Connect to Server -> Enter registered Server name
- • Select authentication type
- • Connect
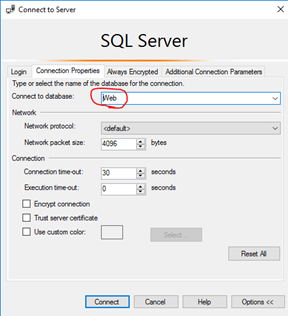
- • To select a specific Database before connecting select "Options >>"
- • On the Connection Properties tab
- • Enter desired Database
- • Connect
Installation: PHP for IIS
- Inside IIS
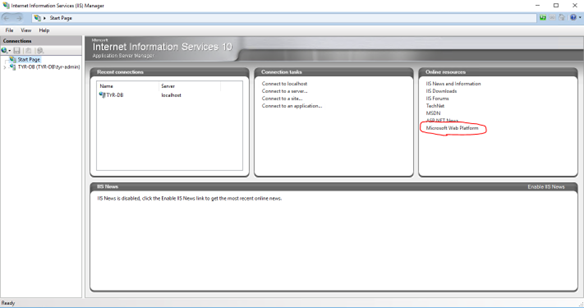
- • Open Internet Information Services (IIS) Manager in the Server Manager Tools menu
- • If you are on Windows 10, open from the start menu.
- • Click the Microsoft Web Platform link
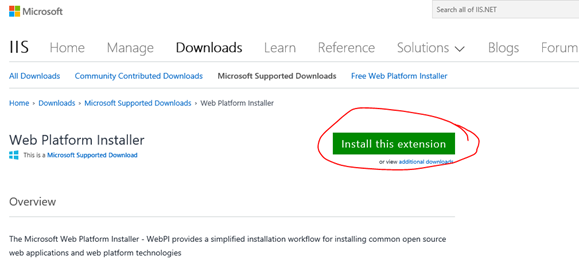
- • You will be taken to the Microsoft Docs page for Web PI
- • Click "Install this extension"
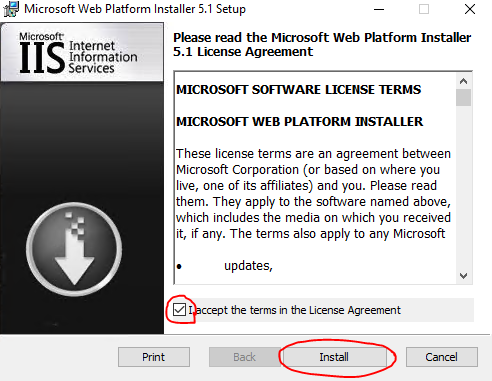
- • Run the installer
- • Install and Finish the wizard
- • Close Internet Explorer
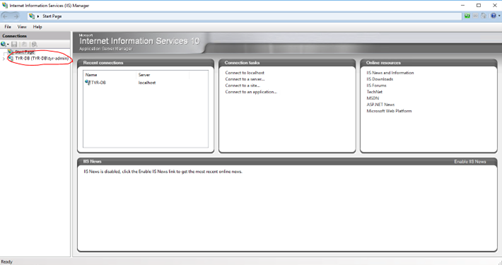
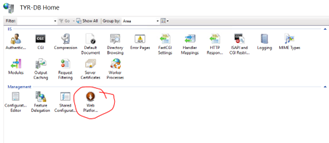
- • Connect to your Web Services Server in the Connections blade
- • You will see the Web Platform Installer that you just added an extension for. Open the Web PI
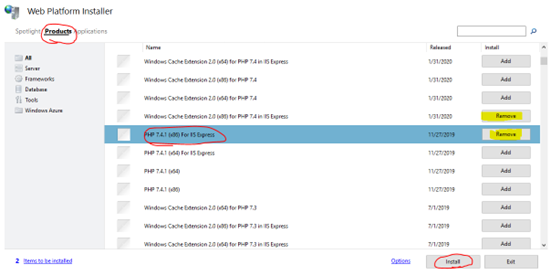
- • Select Products and click "Add" for the most recent PHP version. It may select multiple products when you click only one product. This is normal.
- • Click "Install"
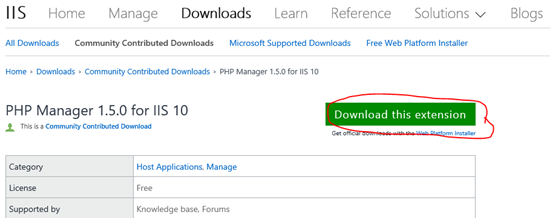
- • If you receive errors while trying to install PHP in this fashion it may be easier to download and manually install from this link:
- PHP Manager 1.5.0 for IIS 10
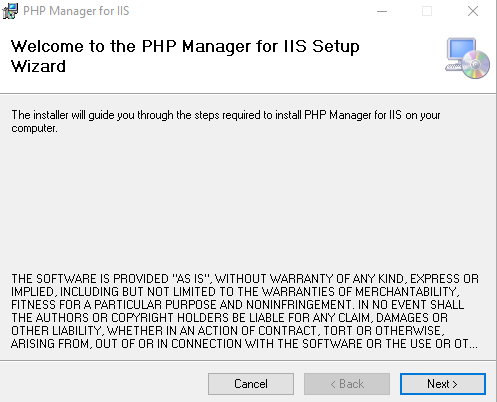
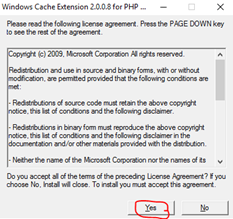
- • Run PHP Manager install, close to exit
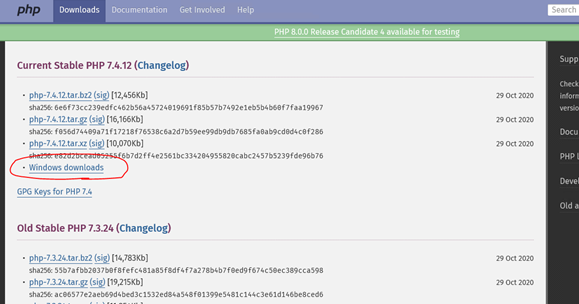
- Install PHP on IIS manually
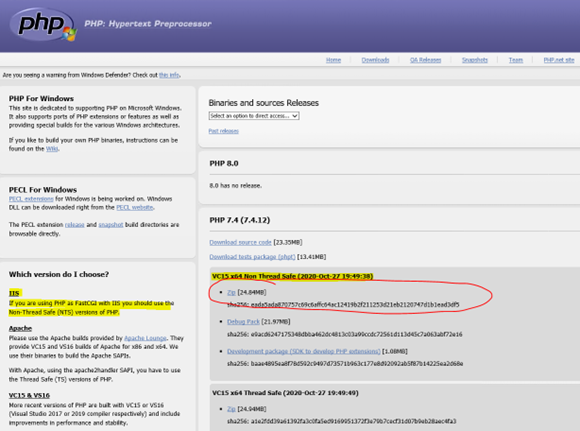
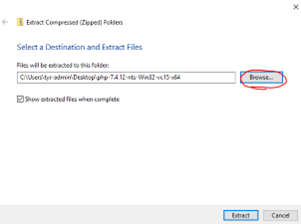
- • Click Save As -> save to desktop
- • Right-click -> Extract all
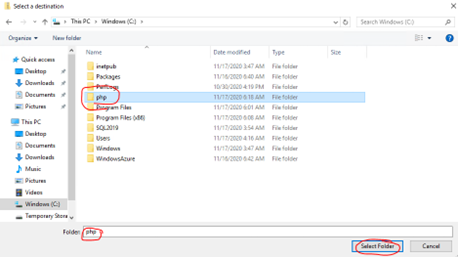
- • Create new folder in C: named "php"
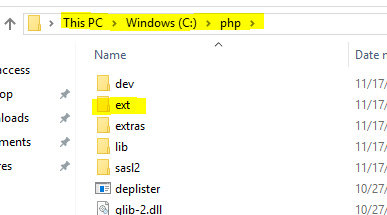
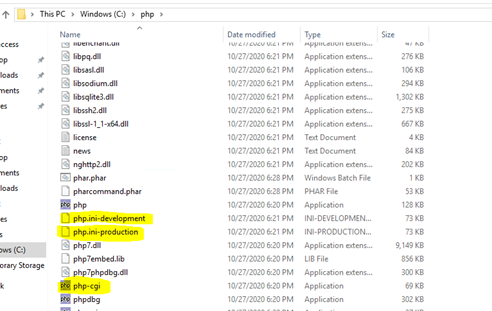
- • This is where your DLLs (Dynamic Link Library) live:
- • Other files of interest for later (php.ini-development will be renamed later to php.ini)
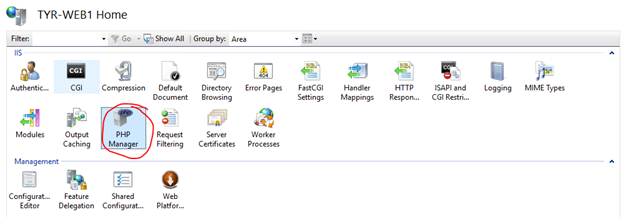
- • In IIS Manager open PHP Manager (may require restart of IIS to show module)
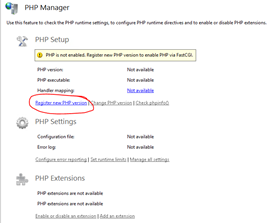
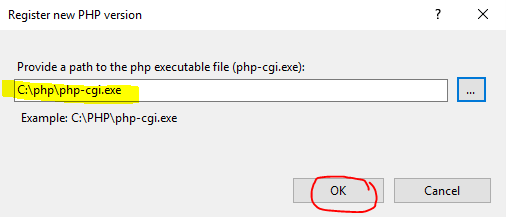
- • Click "Register new PHP version"
- • Register the php-cgi path in C:\php\php-cgi
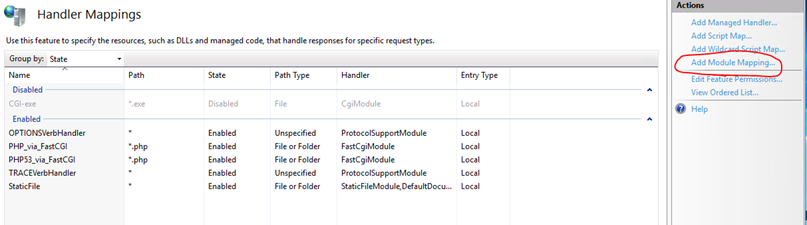
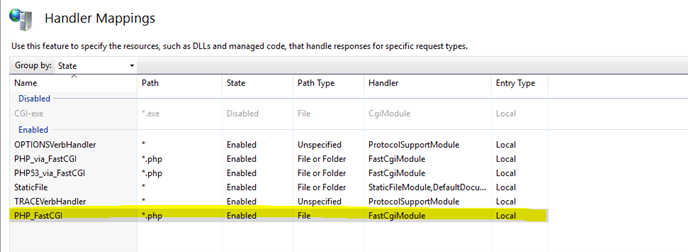
- • Return to IIS Manager and open Handler Mappings -> Add Module Mapping
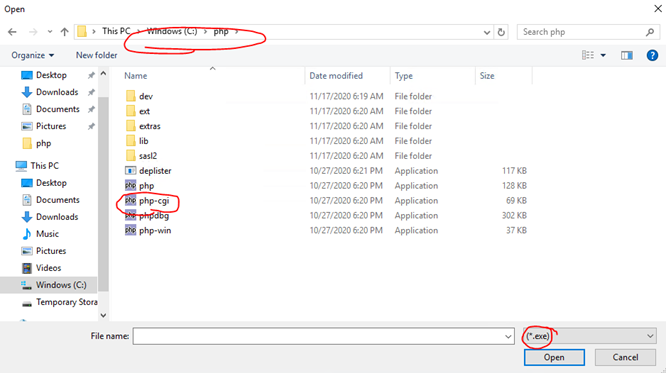
- • In the Actions pane, you will be able to choose “Add Module Mapping” Enter the necessary details to tell IIS that *.php files should be run by php-cgi.exe through FastCGI: (When selecting ellipsis to browse for executable, follow next step to select.)
- • Navigate to the C:\php folder, change the filetype dropdown menu from .php to .exe, select php-cgi -> click Open
- • Select "Yes" to Add module mapping
- • Verify creation
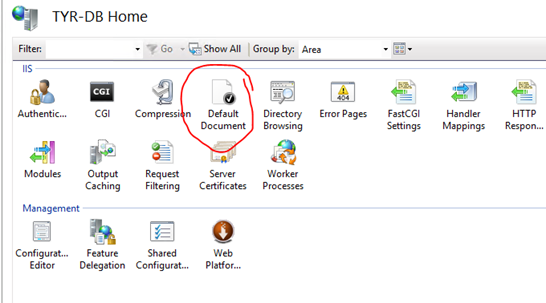
- • Return to the Home page of your IIS Manager
- • Select "Default Document"
- • In the actions pane click "Add…"
- • Add index.php or default.php if they do not already exist (or the name of your default web page file)
- • You can reorder your default documents here based on your web app design. This is where you specify what document for IIS to look for when a user does not specify the document (i.e. your home page) I suggest moving index.html (or index.php if your webpage is entirely php) to the top
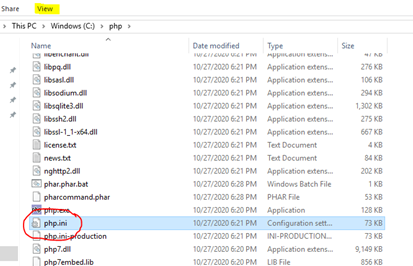
- • Return to the File Explorer and rename php.ini-development to php.ini (best practices are to have a separate php.ini file for each web site instead of one universal file, which is why there are two separate files from the installation)
- • If you cannot see the file extension after renaming the file, click the "View" tab and check File Name Extensions box
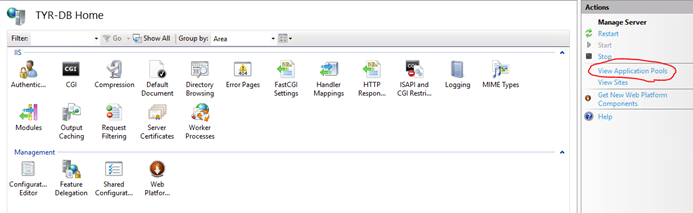
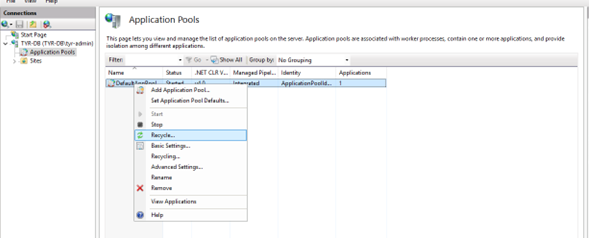
- • Navigate to your IIS Home page and click View Application Pools
- • Right-click and recycle the application pool
- • Close and re-open IIS
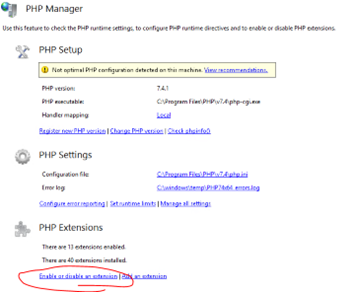
- • You should see the PHP Manager in the IIS Home page
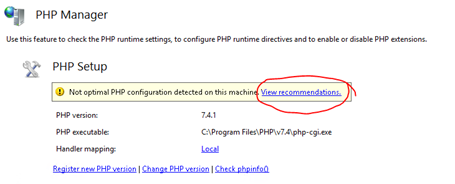
- • Click to open PHP Manager
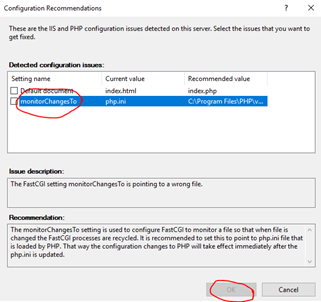
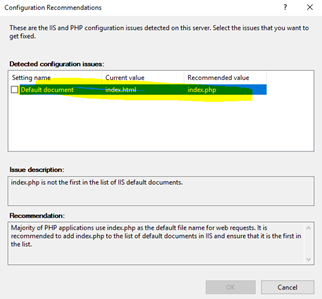
- • Click view recommendations
- • Evaluate recommendations and fix necessary errors (some might be there by design of or environment. (i.e. if your website is HTML, it will yell at you that index.php is not at the top of the default document list.)
- Install WinCache and extensions
- • PHP allows extensions to be installed and enabled. In my default installation, I already had 40 extensions installed. You can install PHP extensions in the “ext” folder under your PHP installation folder. You can also install them through the PHP Manager. Likewise, you can enable and disable extension by editing the php.ini file or by using the PHP Manager. WinCache is a popular extension to improve the speed of PHP on Windows systems. It includes caching mechanisms like user data cache, session cache, file system cache, and relative path cache.
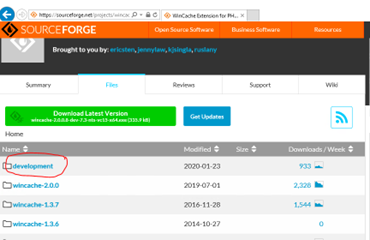
- • Download
- • Ensure you download from the development folder since the other files are for the Web PI version of WinCache
- • Save to desktop and run when downloaded
- • You should install the one with “nts” (wincache-2.0.0.8-dev-7.4-nts-vc15-x64.exe) This stands for Non-Thread Safe since IIS does not multi-thread.
- • Create new folder on desktop (temp folder for WinCache)
- • Extract the files to temporary folder (suggest on desktop)
- • Copy php_wincache.dll to C:/php/ext/
- • In IIS in the PHP Manager enable the extension for WinCache
- Enable WinCache extension in php.ini
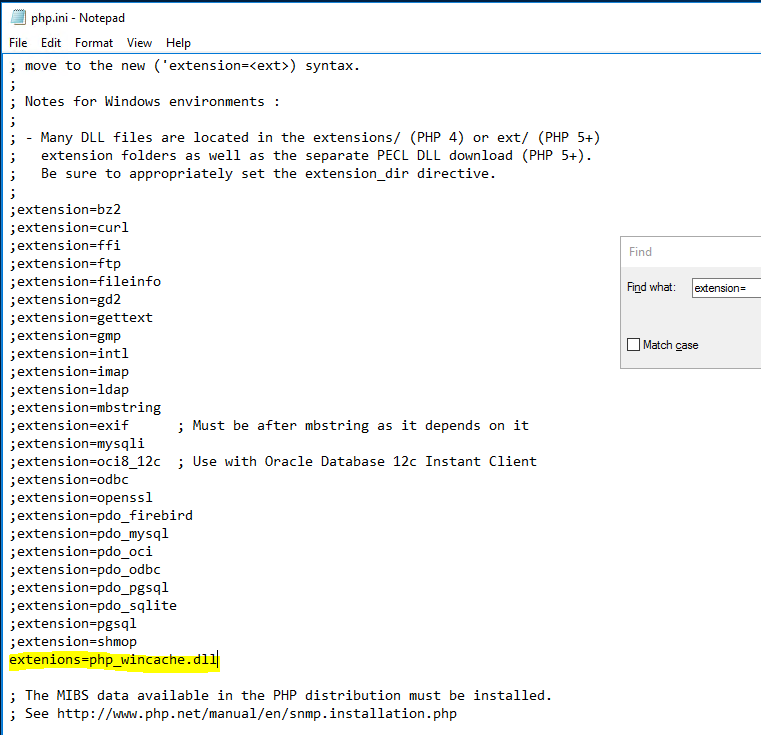
- • For demonstrations sake we will go over how to enable DLL in the php.ini file (open php.ini with notepad)
- • Find the section with the extension (ctrl+f search for 'extension='' will get you there quickly.) Add “extension=php_wincache.dll” to the list. Notice that it is not commented out by a semi-colon. Make sure you save the file and close after making changes. (don't misspell it like I did, or you will have to fix it :P)
- Resume steps
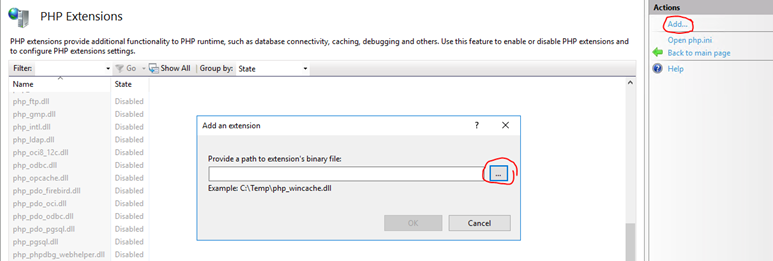
- • In PHP Manager click "Add…" to add an extension
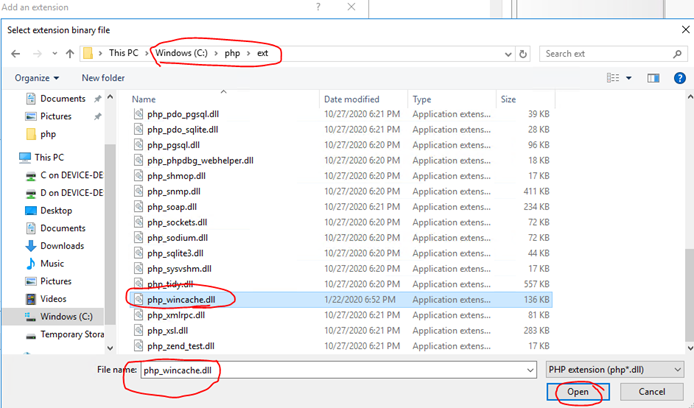
- • Navigate to the "ext" folder and select "php_wincache.dll" -> Open -> OK
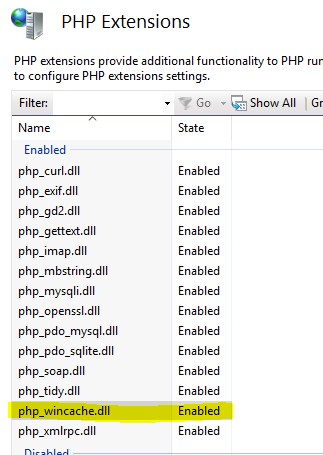
- • Verify WinCache extension is enabled
- Test your installation
- • Open a new notepad
- • Add one line:
- • Save the file to the C:\inetpub\wwwroot folder as phpinfo.php (you might need to go to the folder and make sure the file extension is ".php" and not ".php.txt")
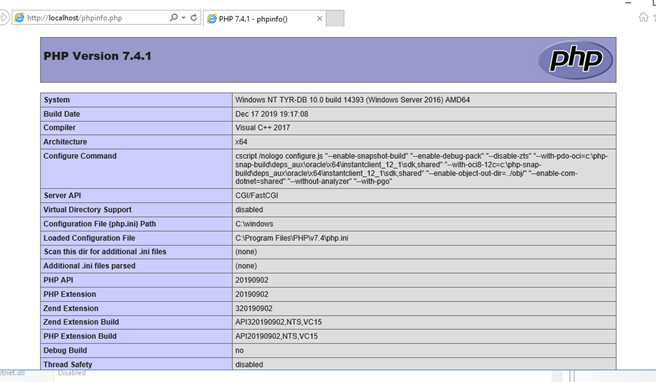
- • Open web browser and navigate to "http://localhost/phpinfo.php"
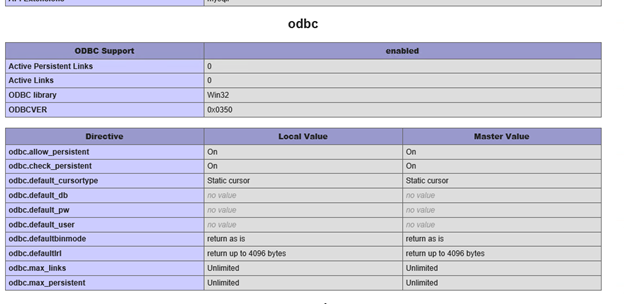
- • If your installation is successful you should see the following:
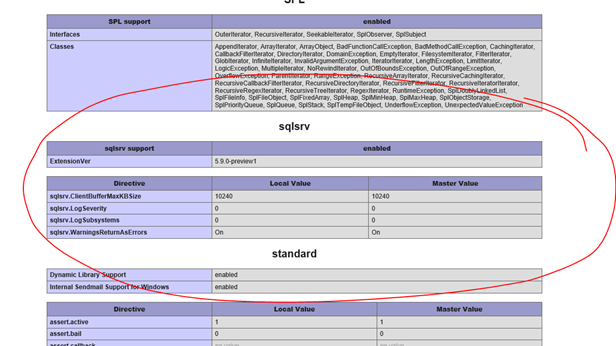
- NOTE: The SQL Server extensions will not be in the output unless you have already installed them
- • If your installation is unsuccessful you will see a blank page with ⟨?php phpinfo();?⟩ and nothing else
- • This is a lengthy page that lists a lot of information including the extensions that are enabled. (we don't have our SQL DLLs yet)
- Best practices for a production website would not include this phpinfo.php file since there is a lot of compromising information so don't forget to delete it before you open your webpage to the world


Install DLLs for Microsoft SQL Server
- Download
- Download
- • The Microsoft DLL support page. Scroll down to where it says:
- To download Windows DLLs for PHP 7.2 or above from the PECL repository, please navigate to SQLSRV or PDO_SQLSRV
- • I suggest going to both and getting both DLLs
- • The Microsoft Drivers for PHP for SQL Server are PHP extensions that allow for the reading and writing of SQL Server data from within PHP scripts. The SQLSRV extension provides a procedural interface while the PDO_SQLSRV extension implements PDO for accessing data in all editions of SQL Server 2012 and later (including Azure SQL DB). These drivers rely on the Microsoft ODBC Driver for SQL Server to handle the low-level communication with SQL Server
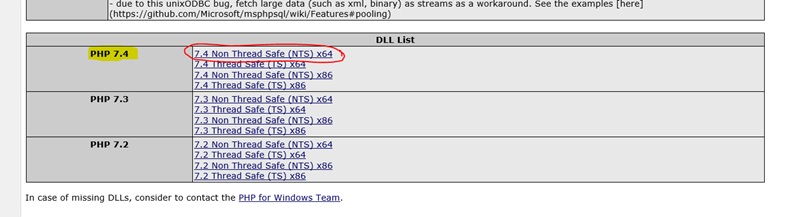
- • Navigate to the PECL (does it make you want to eat pickles?) page for PHP for SQL Server (go to both and get the latest NTS versions)
- Download: sqlsrv
- Download: pdo_sqlsrv
- • Again, get the NTS version for the latest version
- • Save to desktop and unzip the php_sqlsrv-5.9.0preview1-7.4-nts-vc15-x64.zip file
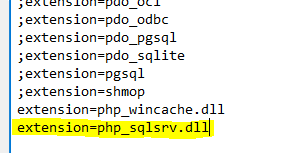
- • Copy php_sqlsrv.dll to the C:\php\ext folder
- • Update your php.ini file or add extension in PHP manager
- • Save and exit
- • Add and enable php_sqlsrv.dll in the PHP Extension in IIS -> PHP Manager -> Enable or disable an extension -> add
- • Navigate to C:\php\ext\sqlsrv.dll and add
- • Repeat for the PDO_SQL DLL
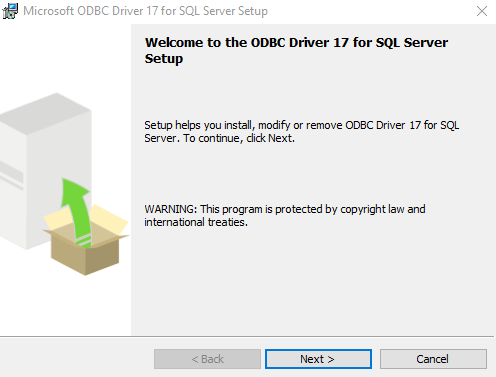
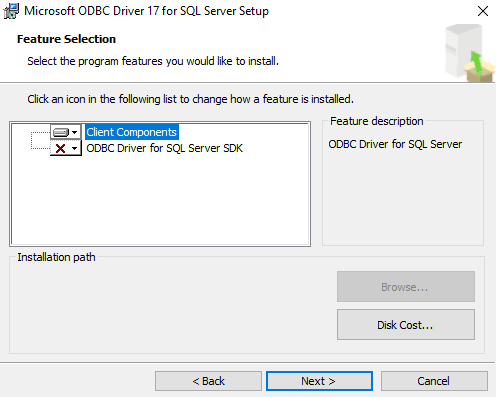
Install Open Database Connectivity (ODBC)
The Microsoft Open Database Connectivity (ODBC) interface is a C programming language interface that makes it possible for applications to access data from a variety of database management systems (DBMSs). ODBC is a low-level, high-performance interface that is designed specifically for relational data stores.
- Download: ODBC Driver for SQL Server
- • Download Microsoft ODBC drivers for you platform
- • Click Download, Run when complete
- • Install on local hard drive
- • Enable in PHP Manager
- • Running the info.php in the browser should now update the extensions for ODBC and SQL Server